!pip install streamlit

#install streamlit ketcher, a molecular editor
!pip install streamlit-ketcher19 Model deployment in Streamlit
![]()
![]()
In this tutorial, we will see how we can deploy our models using Streamlit. Streamlit is an open-source Python library that makes it easy to create and share beautiful, custom web apps for machine learning and data science. We can use Streamlit to create a web app that will allow us to interact with our model.
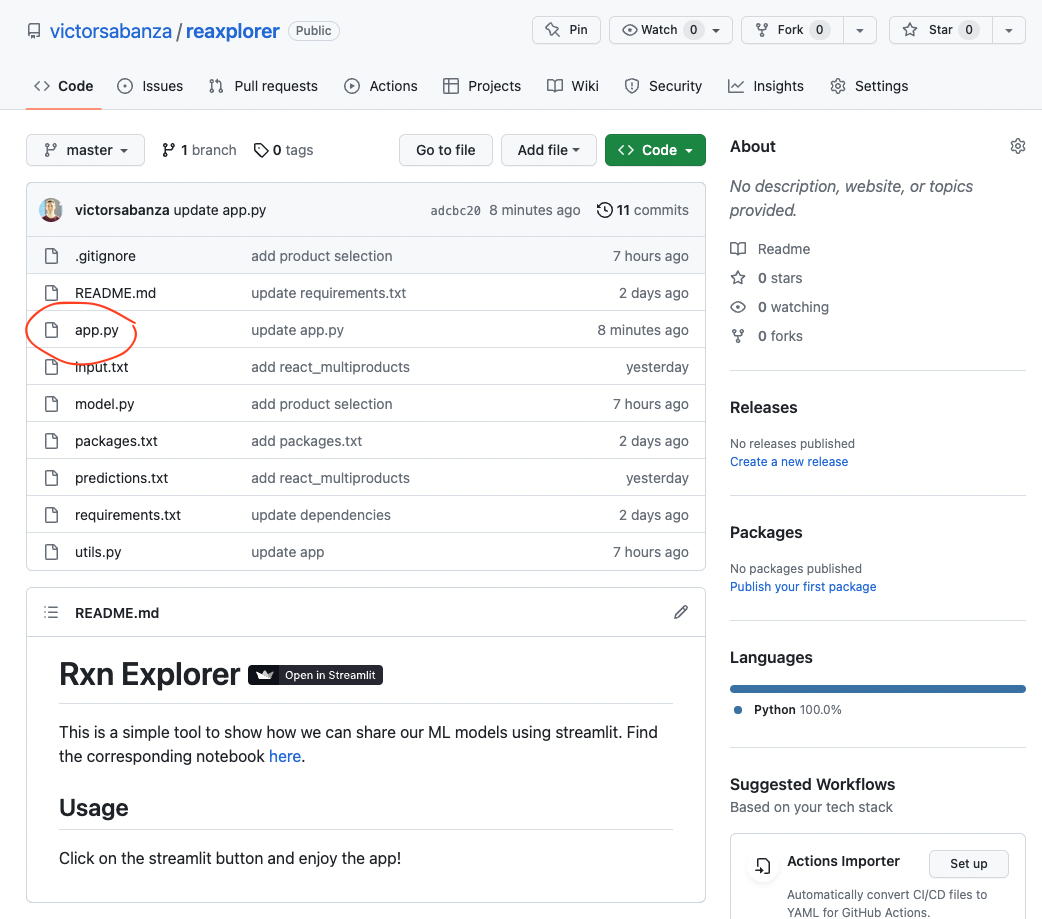
This notebook does not contain exercises, it will be a walkthrough of the steps to deploy a model in Streamlit with a practical example. We use the code in this GitHub repository as an example. You can have a look to the deployed app by clicking on the Streamlit badge above (don’t worry, we will explain step by step the code to create it).
0. Relevant packages
Streamlit
First, we will need to install Streamlit in our conda environment. You just need to pip install it and you will be able to use it.
1. Setting up our repo
After training our model, we will have a GitHub repo containing our beautiful code. You have already done a great job during this course but, wouldn’t it be great to share your work with the world? Let’s do it!
First, we will go to our GitHub repo and create a .py file that will contain the app code. Here, we called it app.py, but feel free to call it as you want. This file
1. Writing the app.py file
Let’s now dive into the code. We will explain different parts of code in the file and their corresponding functionalities in the Streamlit app. First, we import the necessary packages. We import streamlit as st and also the st_ketcher widget, which will allow us to draw molecules in the app.
'''Streamlit app to deploy Reaxplorer'''
import streamlit as st
from rdkit import Chem
from rdkit.Chem import AllChem
from rdkit.Chem import Draw
from model import *
from utils import download_model_uspto480k, download_mcule_molecules, take_random_subset_mols, check_rxn
from streamlit_ketcher import st_ketcher
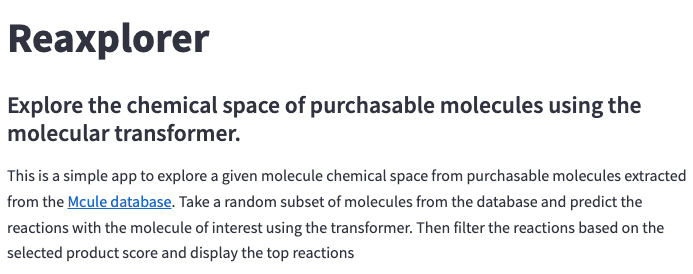
from rdkit.Chem.QED import qedThen, we will create our first lines in the app. In order to do this, we use st.title and st.write to include text (a title and a brief introduction explaining the purpose of the app). The latter is very useful as it accepts any text in the markdown format and renders it into the app. You can check additional documentation here.
#start the app
st.title('Reaxplorer')

st.write('''#### Explore the chemical space of purchasable molecules using the molecular transformer.

This is a simple app to explore a given molecule chemical space from purchasable molecules extracted
from the [Mcule database](https://mcule.com/database/). Take a random subset of molecules from the database
and predict the reactions with the molecule of interest using the [Molecular Transformer](https://pubs.acs.org/doi/full/10.1021/acscentsci.9b00576). Then filter the reactions
based on the selected product score and display the top reactions

''')
This is the final result in the app
Sidebar functionalities
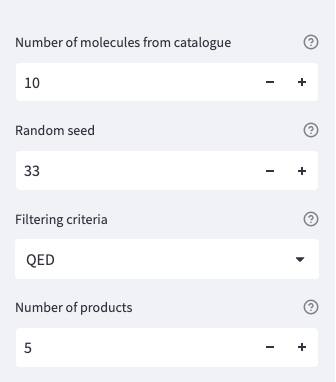
We want our model to be interactive, so the user can play around and change different options. In order to do this, we will use the sidebar functionalities. We can create a sidebar using st.sidebar. Then, we can add different widgets to it. In this case, we will add four selecting widgets, one for each of the parameters of our model.
n_mols = st.sidebar.number_input('Number of molecules from catalogue', min_value=1,
                        max_value=500, value=10, step=1,
                        help='Number of molecules to select from Mcule database')

random_seed = st.sidebar.number_input('Random seed', min_value=1,
                        max_value=100, value=33, step=1,
                        help='Random seed to select molecules from Mcule database')

filtering_criteria = st.sidebar.selectbox('Filtering criteria',
                        ['QED', 'LogP'],
                        help='Scoring functions for product molecules')

n_products = st.sidebar.number_input('Number of products', min_value=1,
                        max_value=100, value=5, step=1,
                        help='Number of products to display')
You can see the sidebar on the left part of the app. We can then easily interact with the model by changing the parameters.
Downloading model and purchasable molecules files
Now we will download the files we need to run the app. You could directly upload them to GitHub, but it is better to download large files to avoid problems with GitHub storage. In order to do this, we will simply use two custom functions we include in the utils.py file. After loading the files, we will display a success message using st.success.
#download the model
download_model_uspto480k()

#download the mcule molecules
download_mcule_molecules()

st.success('Downloaded model and molecules')
A success message will be displayed if all files are downloaded correctly

Adding different tabs for input and output
In order to separate the input from the output and make the app cleaner, we will create one tab for each part. This can be done using st.tabs and a context manager. After creating the tabs, we will add the widgets to each of them.
For the input tab, we add some text and then an st_ketcher widget to draw our molecule. This super useful and recent functionality allows us to directly draw molecules and translate them into SMILES internally (so the user doesn’t need to know the SMILES of the molecule!). Then, we take a random subset of SMILES from the Mcule catalogue and display them as a grid image using st.image.
tab1, tab2 = st.tabs(['Input', 'Output'])

with tab1:
    st.write('''### Draw your molecule of interest''')
    st.write('''Draw the molecule you want to react with the molecules from the Mcule database
    and click **Apply**''')
    molecule = st_ketcher(value='', key='molecule')

    #read only a random subset of n_mols molecules from the .smi file
    mols = take_random_subset_mols(n_mols, random_seed)

    #display molecules as rdkit mol objects
    mols_img = [Chem.MolFromSmiles(mol) for mol in mols]

    #display images of molecules
    st.write('''#### Selected molecules from Mcule database''')
    img = Draw.MolsToGridImage(mols_img, molsPerRow=5, subImgSize=(200, 200))
    st.image(img, use_column_width=True)
As you can see, we have a molecular editor to draw our molecule in a very intuitive way for chemists.

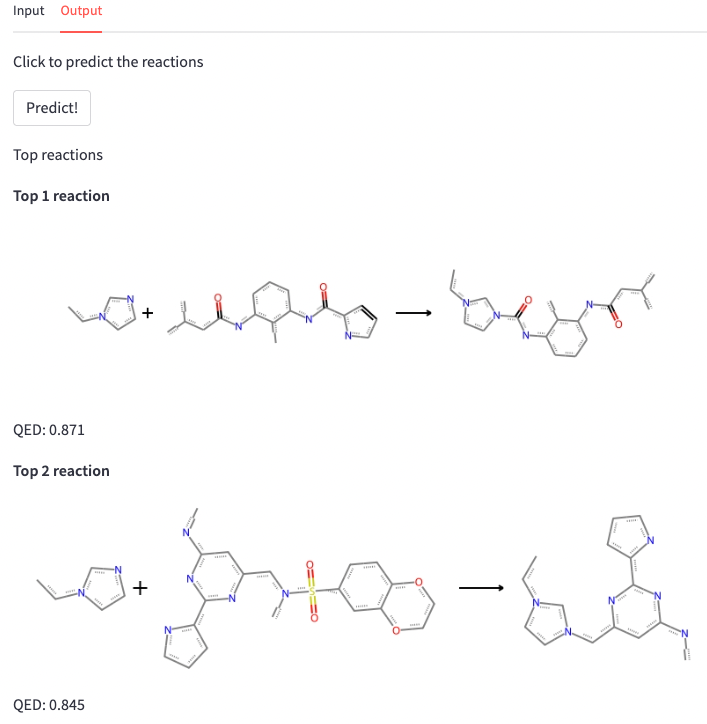
Finally, we write the output tab. We include a st.button to run the model after drawing the input and selecting the molecules. If the button is clicked, the model runs taking as input the drawn molecule and the Mcule molecules. The functions we use are included in the models.py file (here is where the magic happens!). Of course, the accuracy and utility of your model will only depend on your own code, Streamlit can only help you to make it more visual and easy to use :)
After getting the reaction predictions, we filter the non valid results and score the product according to our selected criterion. Then, we display the top-n reactions as a grid image together with the score of the product.
with tab2:

    st.write('''Click to predict the reactions''')
    start = st.button('Predict!')

    if start:
        predicted = react_multiproducts(molecule, mols)
        #filter non valid reactions
        predicted_filt = [rxn for rxn in predicted if check_rxn(rxn)]
        top_reactions, top_scores = score_reactions(predicted_filt, n_products, filtering_criteria)

        #return top n products
        st.write('''Top reactions''')

        for i, rxn in enumerate(top_reactions):
            st.write(f'**Top {i+1} reaction**')
            rxn = ReactionFromSmarts(rxn)
            img = Draw.ReactionToImage(rxn)
            st.image(img, use_column_width=True)
            st.write(f'{filtering_criteria}: {top_scores[i]}')
Et voilà! We can easily use our model and see the results.
2. Deploying the app
We have our app file ready, but how can we really deploy it to share it with other people? Streamlit makes it very easy. We just need to run the following command in our terminal (make sure you are in your project folder):
streamlit run app.pyThis command will give us an HTTP address that we can copy and paste in our browser to see the app. We can also share this address with other people so they can see our app.

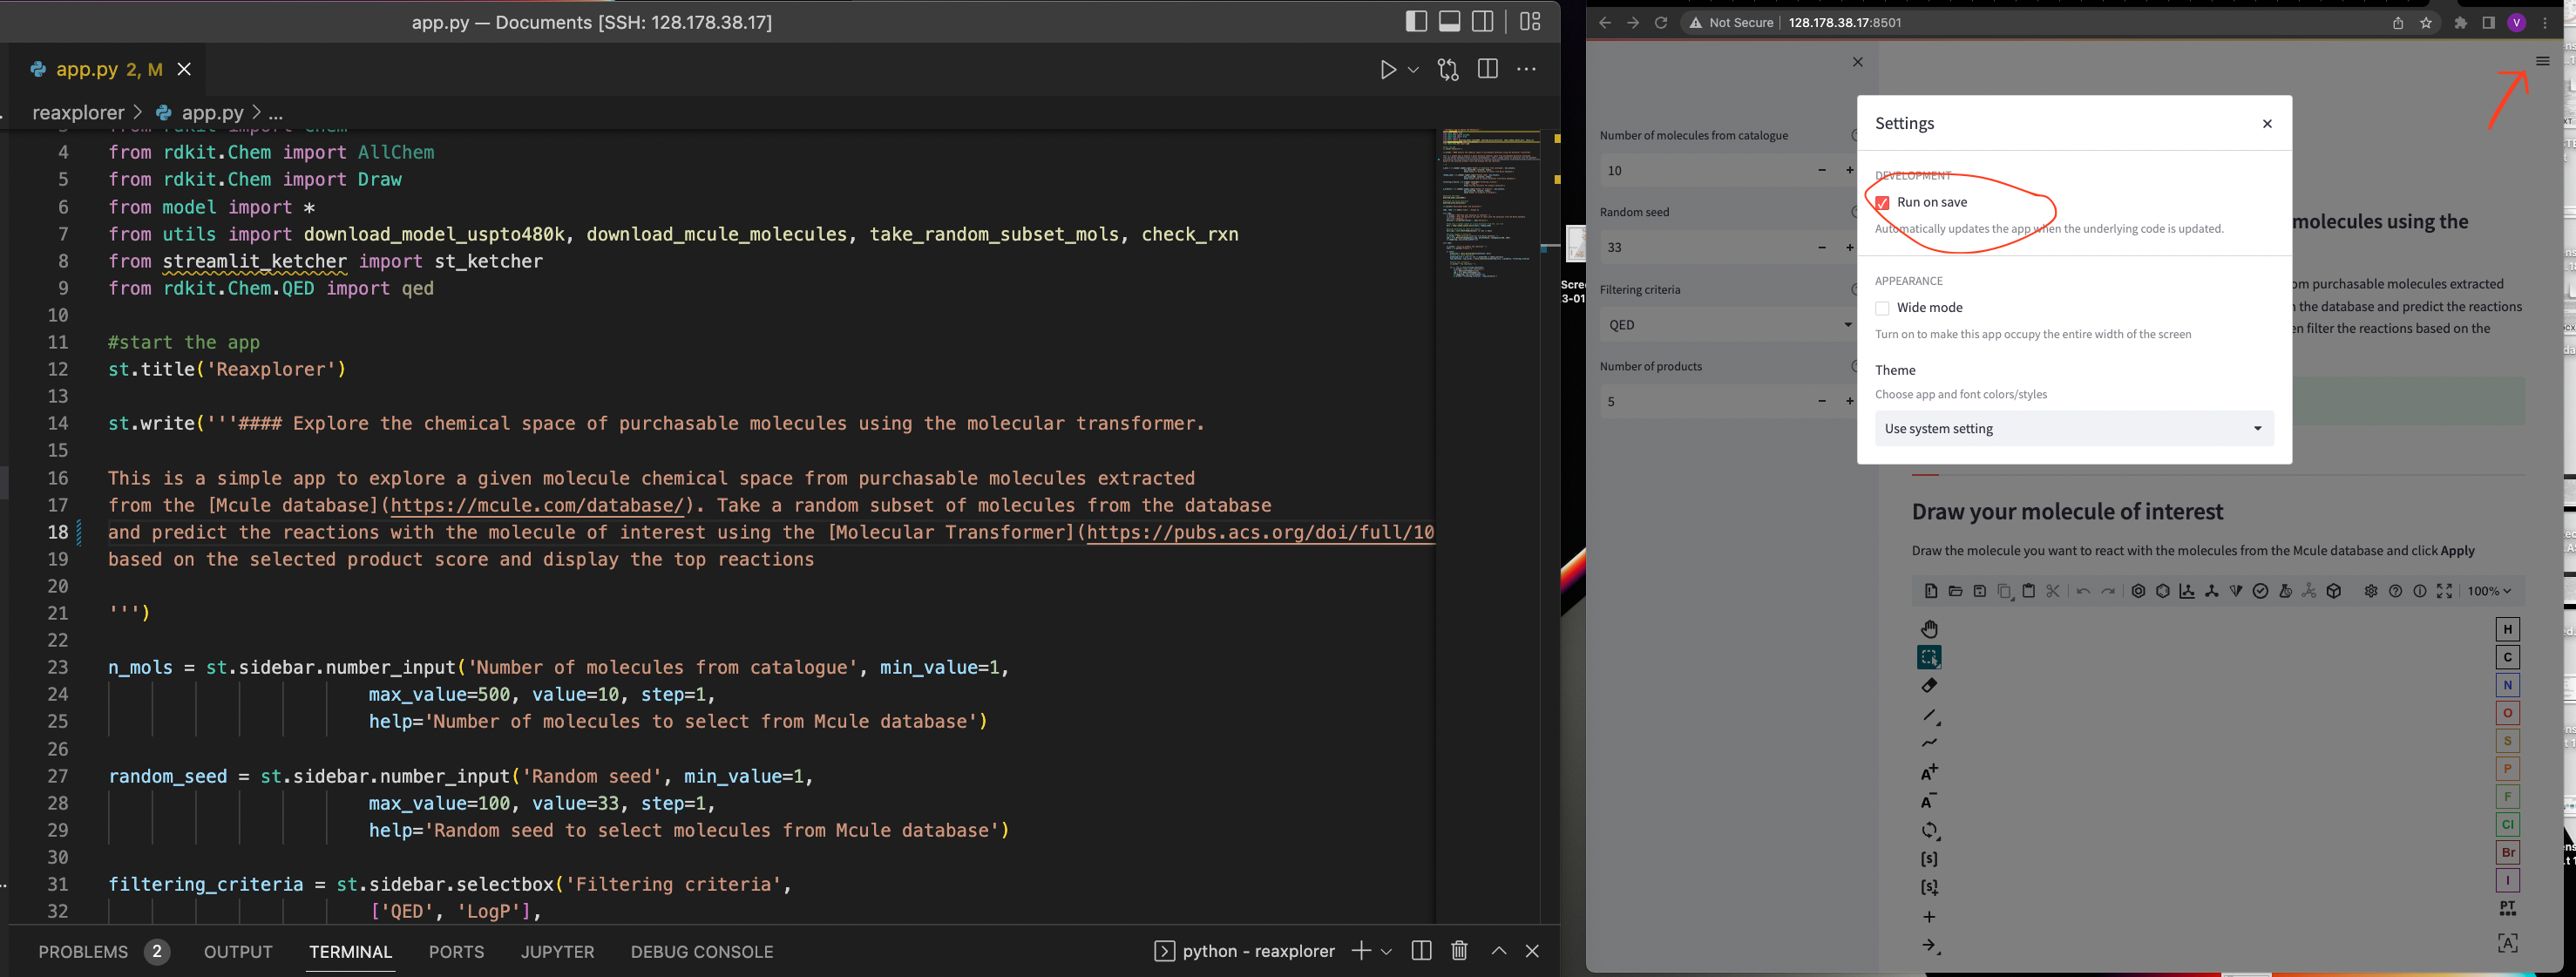
One of the coolest things that Streamlit offers is the ability to modify the source code and see the changes in real time. This is very useful when we are developing our app and we want to see how it looks like. We just need to save the changes in our code and the app will automatically reload. Make sure you change the settings on the upper to Run on Save to activate this functionality. Now everything is ready to develop your app in few minutes!
Sometimes the link we obtain cannot be open outside our local network. In order to deploy the app publicaly, we can use Streamlit servers. To do this, you would need to create and account in Streamlit Community Cloud and link your GitHub account. Then you can select the GitHub repo containing the code and deploy it.
One crucial thing to consider is adding a requirements.txt file with all the packages needed to run the app. This file will install the packages our app needs to run. Other dependencies can be installed using a packages.txt file. Check the documentation. Here you can see the packages we specified for our app in our requirements file:
rdkit==2022.9.5
gdown==4.7.1
opennmt-py==2.2.0
streamlit_ketcher==0.0.1
streamlit==1.22.0
And that’s it! We hope you enjoyed this tutorial and you can now create your own amazing apps. If you have any questions, feel free to check the documentation and explore all the functionalities Streamlit offers.
Finally, we will like to thank the Streamlit team for the fantastic work they are doing to make model deployment easier for everyone.